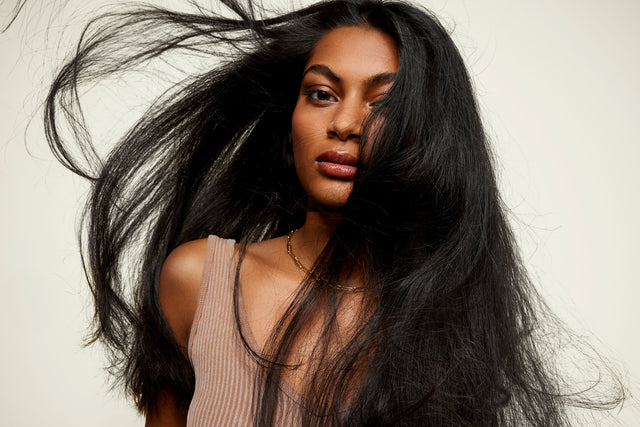
Over the course of the last year, a number of previously oft-used beauty products have become ancient relics for team Odele. Among other artifacts, heat styling tools have found their way to the deep, dark corners of our drawers. Goodbye, curlers, dryers and straightening wands; hello, “whatever happens, happens” and wet shoulders from dripping locks.
What we’re really saying is: Why risk heat damage if you can keep your cotton hair wrap in and camera off during your morning Zoom meeting?
That’s why we’re here: to spread the gospel of air dry and prove that laziness and style are not correlated. Today, we’re presenting you with some absolutely effortless and heat-free styles for you + your people to try. A simple routine and cute hair—you truly can have everything.
The best air dry hair products
The right products and tools can make a big difference when it comes to ease and effort on your part. Here are a few of our can't-live-withouts.

Air Dry Styler
Formulated to smooth, condition and create soft separation in your locks, Air Dry Styler is best for hair that’s straight to wavy or curly, fine to medium.
Leave-in Conditioner
For frizz control, deep moisture and the detangling help of your dreams. Leave-In Conditioner pairs well with hair that’s wavy to curly, medium to coarse.
Leave-in Detangling Tonic
A lightweight leave-in detangling spray that also protects hair against environmental damage. Excellent for all hair types, especially the tangle-prone tresses of little ones.
Texturizing Sea Salt Spray
The beach in a bottle! Texturizing Sea Salt Spray helps create fullness and gives your hair a tousled, beachy texture. It’s ideal for hair that’s straight to wavy or curly, fine to medium.
A towel/hair wrap/old t-shirt
Don’t want your shoulders soaked post-shower? Have an extra towel on hand to speed up the drying process. There is a caveat here, though: Did you know you’re not supposed to wrap your hair up in regular bath towels? (We know—we’re guilty, too.) Instead, gently blot and squeeze your hair in small sections to prevent damage.
If you simply can’t ditch the towel crown, try a microfiber hair wrap—they’re made of a softer, more fibrous fabric that’s extra absorbent and gentle on your hair. An old cotton t-shirt works, too!
8 easy air dry hairstyles for all hair types
Curly + coily

1. Plop it like it’s hot
What you’ll need: An old t-shirt (long-sleeved is best), Leave-in Conditioner
Plopping is a game-changing drying technique created by the curly hair community. When done right, it cuts down dry time and helps create defined, bouncy, voluminous curls. If it’s new to you, don’t fret—we’re so happy to introduce you.
How to plop hair: In the shower, detangle with your fingers while your conditioner is in—this will help cut down on frizz during the air-drying process. After showering, gently scrunch out excess water. Use your fingers to comb the Leave-in Conditioner through your strands from root to tip, using as much product as you need to ensure each coil gets coated evenly. Lay your t-shirt on a flat surface, sleeves nearest you.
Next, flip your head forward like you’re a little kid (or the Little Mermaid) and about to do the “George Washington" in the pool. Your hair should be on top of your (semi-upside down) head and centered on the shirt. Now, take the fabric that’s behind your head and flip it over your neck, tying the sleeves over it into a knot. Re-adjust upright and tie the sleeves in another knot in the front to secure. Here’s a step-by-step guide with photos that may come in handy.
2. Lazy braid out
After detangling, part your mane into four sections. Smooth a generous amount of your leave-in product through each, then braid each section (four braids total), leaving an inch or two of unbraided hair at the bottom of each braid.
Coat your fingers with a little extra leave-in and twirl that last inch or two of loose hair until it forms a slick curl (this last step prevents your ends from going wild).
Once your head is completely dry, gently unravel each braid to reveal ultra-hydrated, super-defined coils that should last for days. Separate, fluff and go!

3. Thick hair hack
What you’ll need: Air Dry Styler
We know, the issue with air-drying that beautiful, heavy mane is that it takes forever. This’ll be worth it, though—trust us. Shower 1-2 hours before bed (there—timing problem solved!) and, when your hair is just-damp, comb the light Air Dry Styler through and twist it up into four or more buns. Secure them with scrunchies rather than hair ties to prevent breakage. When you wake up, take them out and you’ll be met with perfect waves. Ta-dah.
4. A little more body, please
What you’ll need: Air Dry Styler or Leave-in Conditioner, large hair pins or clips
Start by squeezing out excess water from your wet hair. Then, scrunch in some of your preferred styler. Section your hair and throw in some metal clips along your scalp, lifting up your hair before pinning them shut. Drying your hair with the pins in will result in more volume (as well as a potentially faster drying process since individual sections have more room to breathe).
Wavy

5. Everything but the ocean
What you’ll need: Texturizing Sea Salt Spray, optional conch shell to get in the mood
A beachy ‘do is easily perfected with our Texturizing Sea Salt Spray. All you have to do is spray onto your hair (dry or damp!), tousle and hit the road.
6. Your waves, your way
Do wavy-haired people really have it so easy with this whole air-drying thing? Yeah, they kinda do.
On damp hair, smooth Air Dry Styler on from about halfway down the hair shaft through the ends. Scrunch and twist as you like, and then no touching until it’s fully dry. Let the styler do its thing to coax your natural waves out with none of the frizz.
To achieve a more intentional shape, twist and pin damp hair behind your ears (and really, wherever you want a bend). When your hair dries, the waves will remain exactly where you wanted them.
Straight

7. Keep it simple
What you’ll need: The right shampoo + conditioner, Dry Shampoo
The easiest and best advice we can give: Don’t. Do. Anything. After your shower, throw your hair up in a wrap or t-shirt and sit until it’s about halfway dry. Take it down and let it be! You should end up with a subtle wave when all is said and done.
If you need a little extra volume boost, work a few pumps of our Dry Shampoo into the roots at the crown of your head and tousle.
8. A blow-dryer-free blowout
What you’ll need: Air Dry Styler, rollers
When was the last time you used rollers? Let’s bring them back, why don’t we? Let your hair dry almost fully (there’s a theme here!) before popping your rollers in—the bigger, the better. Let dry, unroll, shake out and revel in the bounce.